Showing posts with label business tips. Show all posts

Handmade Business 101: Choosing A Price Point For Maximum Profit

Posted Monday, April 16, 2012

Business 101 is a new monthly series from Sarah of CuriousWorkmanship designed to help you improve the success of your handmade home business.  

Last month we learned about the difference between revenue and profit. This month we're going to focus on profit and learn how to make the most profit we can.

If you want to make more money, you might think you should just sell more crafts. And if you had an unlimited amount of crafts to sell and a steady supply of materials at the same cost, you'd be right. But you don't. There are only 24 hours in your day, and a large number of those are spent eating, sleeping, cooking, cleaning, traveling, shopping, and (if your life situation is like mine) wiping noses and behinds. So the amount of product you can make has a maximum. You might think that if you sold that maximum amount of product, you'd make the maximum amount of profit. But you'd likely be wrong. Your profit depends not just on how much you sell, but the price at which you sell.

If you can sell your goods at a higher price, you make more profit per item. And if you can sell all your items at a higher price, then you should do that. But, as my dad always told me, the price of an item is precisely that which the market will bear. If I could get people to buy my baby booties at $100 a pair, I'd be selling them for that much-- but few would be interested at that price.

It's widely known that people generally buy more of stuff when the price is lower, and less of it when the price is higher. But allow me to illustrate how selling more items might actually mean LESS money for you. (I'm going to pick some nice round numbers to make the math easier, so bear with me if they're not 100% realistic costs and prices. We're also going to disregard labor as a cost, just to make it easier to illustrate the point.)

Suppose you make hair bows. The materials for these bows cost you $1.00 per bow. You sell them for $3.00 each. Each hair bow you sell profits you $2, so if you sell 50 of them today you've made a profit of $100.

Now suppose you raise your price to $5. Your customers are looking at these hair bows and saying "Gee, it's cute, but is it $5 cute?" Some, the ones who think they're so cute they'd have them at just about any price, are plunking down the $5. Some are not. At the $5 price you're only selling 30 of them today instead of 50. "Oh no," you say, "I've driven off nearly half my customers!" But how much PROFIT have you earned? At the $5 price point, your profit on each hair bow is $4 ($5 minus the $1 cost). So your profit from today's sales is $4 times 30 or $120. That's $20 MORE than you earned selling them at a lower price!

Now you're thinking, "Wow, that was cool! Why don't I just raise the price to $20?" So let's try it. You raise the price to $20 and now you have only 3 customers. Each hair bow makes you $19 and so you've profited just $57. You can't keep raising the price forever; at some point your profits will drop off. Somewhere between $5 and $20 is a price that will maximize your profit on these hair bows.

Now if you're into calculus, you can use this information to create a mathematical model and calculate the price you need to charge to get maximum profit. But you don't have to do any advanced math to figure out (more or less) what the price is that will give you maximum profit. Just give it a try! Sell at different price points at similar craft shows (or similar times of year on Etsy). If you notice you make less money at a higher price, go lower. If you notice you make less money at a lower price, go higher. But now you know a business secret: selling more doesn't always make you more money!

Next month we'll discuss how to calculate shipping and handling charges and make them work with Etsy's system.

Make Your Own Fabric Labels

Posted Saturday, December 17, 2011

Giving handmade is an important aspect of the Holidays for many EtsyKids Team members.  We are making gifts, purchasing from local stores and purchasing from many of our EtsyKids Team friends in order to have a handmade holiday.  


Recently, EtsyKids Team member, SnugglyMonkeyCo, shared a tutorial on how to make fabric labels.  How perfect the holiday season!  Her simple instructions will make it easy to create custom labels to put on your handmade gifts ... like a scarf for dad, tea towels for grandma, skirt for sister, blanket for baby.    


Ouchie Pouch Hot / Cold Therapy Pouch

Here are Claudia's instructions:  Whether you are making something as a gift or a new item for your shop, I think these labels are the perfect finishing touch for a handcrafted item. Enjoy and please let me know if you have any questions!

What you need:
  • Sew-on Printable Cotton Fabric Sheets
  • Printer
  • Heat-n-Bond Iron On Adhesive (see notes below for which kind to get)
  • Ruler, Cutting Mat, Rotary Cutter (Or Fabric Scissors)
  • Iron


Step 1: Design
Start off by designing your labels with your favorite word processor/photo editing software. If you haven't checked out Picnik yet, you should! It is a fantastic photo editing site with lots of cool features, and the best part is that the free part of the site can often times be all that you need.

Once you have your design, decide how big you want your labels to be and then lay out the labels using your word processor onto an 8.5"x11" standard page.  For example, my labels are about 2" wide by 0.5" tall. I set my page up in the Landscape orientation and have 4 columns with 14 labels in each column, so I get a total of 56 labels per page. 

Step 2: Print 
Grab your Printable Cotton Fabric Sheets. You can buy these at your local fabric store (look in the "Quilting Notions" area). Typically, they cost about $10 for 5 sheets. There are lots of different brands available. You can usually find them in either white or beige, sew-on or iron-on. Pick whichever color you think would work best with your design.  For this tutorial I use the "Sew-On" kind, but you could use the iron-on sheets and skip steps 3 & 4. I will say that from my own experience, the iron-on sheets do not have as strong of a bond as the Heat-n-Bond will give you. That is why I iron on my own adhesive instead. 


Follow the directions on the package for printing out your labels and heat setting the ink. If you are going to be putting your labels on something that can be washed (such as a quilt or clothes), I recommend following the instructions for colorfasting the fabric sheets as well. 

Step Three: Iron-on Adhesive
I find it difficult to keep my labels exactly where I want them on my items when I try to stitch them on at this point. So, I like to put some iron-on adhesive on the backs of my labels first. Then, I iron the label in place and topstitch. I find that this helps me get a nicer, cleaner look in the end.

Once your fabric sheet is ready to use, grab your Iron-on Adhesive. You have two options with Heat-n-Bond: Sewable (Purple package) or Ultra-Hold (Red package). If you only want to Iron On your labels with no stitching, then go with the Ultra-Hold.

If you want to topstitch your labels in place, go with the Sewable. Do not sew through the Ultra-hold - trust me - I learned this the hard way. You will get adhesive inside your sewing machine, and it will screw up your bobbin tension or worse. (And the money you are saving by making your own labels will go to getting your machine repaired!)


Cut an 8.5"x11" piece of the Heat-n-Bond and following the instructions on the packaging iron it onto the back of your labels.

{Tip: Put an old t-shirt down on the top of your ironing board before you iron on the adhesive. That way if your label sheet and the adhesive sheet do not exactly line up, the excess adhesive will get on the old-shirt instead of our ironing board cover. And, your husband won't get upset when he goes to iron his work shirts and ends up with an ugly, sticky glue mark on his shirt....}

Step Four: Cutting Your Labels
The final step is cutting out your labels. I find it easiest to do this with a rotary cutter and ruler, but it is also possible to do it with regular fabric scissors as well. I am just a bit challenged at cutting nice, neat straight lines with a scissor, so I use the rotary cutter. 


Once you have your labels cut out, all you need to do is iron them on to your item and stitch them in place.
Eye pillows with removable covers. 

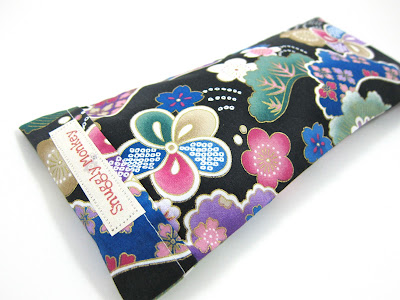
A big thanks to Claudia for sharing her tutorial with us.  Whether you are looking for a new ID Badge Reel or Lanyard to dress up your work wardrobe, an Eye Pillow to help you relax after a long day or an eco-friendly Ouchie Pouch (Hot Cold Therapy Pack) for your little one, you will find all of these and much more at SnugglyMonkeyCo!  You can see more of Claudia's tutorials and see examples of her work on her blog.
   

Photo Makeover Series Part 4

Posted Tuesday, May 24, 2011

EtsyKids Photo Makeover Series Part 4: Photo Editing, Props, Styling and More!


TwoLittleBluebirds continues her Photo Makeover Series on the EtsyKids Treasury Team Blog this week with her fourth installment filled with styling tips to enhance your product photos and entice buyers! She also discusses free photo editing software programs along with tips for editing your photos. Jump on over and see what improvements you can make to your product photos. You've got a month to put TwoLittleBluebirds advice into action and enter your new product photos in the final photo makeover challenge. Contest details and how to enter are found on the EKTT blog.

Crafting A Business

Posted Saturday, February 13, 2010


My Rock out SIL got me a book for my birthday that I had been wanting since it came out! Crafting a business by Country Living/Kathie Fitzgerald. It highlights 31 women entrepreneurs who have been successful in creating a business (including Amy Butler) and shares their tips and suggestions and advice - I've only started reading it but I LOVE it and I will be giving it as gifts for some women in my life!

I wanted to share two things that have really stood out to me in the first two chapters.

1. A quote from Winston Churchill that is one of Denise Carpentier's favorites. Denise makes Pearlware Pottery in Averill Park NY.
'What we get, is how we make a living; what we give, is how we make a life.'


2. A quote from Liz Alpert Fay who makes hand hooked rugs in Sandy Hook Connecticut.
'Sometimes people tell you that you can't do things because maybe they can't do them.'I will share interesting things from the book as they catch my eye. I hope everyone is having a terrific weekend! SMoochES!

Happy Holidays from my Biz Classes to you! ;)

Posted Saturday, December 05, 2009


HOWDY!!! I feel like I've been gone for years! LOL! Since I've taken up business classes - my world has shut down for the most part - well, the creative parts anyway - I have 2 more weeks and then Ill be back to my normal, blabbing, tweeting, facebooking, sewing and listing self! YAY! The saying that you don't know what you got until it's gone is SO true - ;)

So today I wanted to share a little nugget from my class - and that is identifying your target market. Until you do this - how will you know how to market your wares?

The two questions to ask yourself is who is my audience and what do they expect.

Now, of course at first when I asked myself who is my audience the simple answer is 'mothers of little girls' BUT you have to dig deeper than that - who REALLY are they - are they high, middle or low income--how old are they--do they shop online or in stores--what region do they live, etc...

Then you have to dig to find out what they expect > price, quality, turn around time, customer service, style, etc..
Fortunately in this day and age we have so many resources online that you can find out any and everything about your target market!

Once you've answered these two questions you will have a foundation to build your marketing plan around - and you can stop wasting time on unnecessary steps and focus on what matters to the people who buy from you!

I hope you all continue to have a blessed holiday season! XO

9 Tips to be more Creative

Posted Saturday, August 22, 2009


I woke up earlier than usual this morning and was cruising around blog land to my favorite reads. I went to see what fellow EtsyKids member JoeyandAleethea was doing (psssst...she just celebrated her 5th anniversary - CONGRATULATIONS!!!!) She had a link in her latest post from a blog called Pikaland, which I am now following, because I love it! And the latest post on that blog is 9 Tips to be more creative - so I tossed what I was gonna write about today - and I hope this inspires you just like it did me! Thanks Pikaland and J&A:

About fueling creativity:

  1. Creativity is fueled by experiences, sights, sounds and smells. Sitting still won’t bring new ideas in; experimenting and trying new things will jog your creativity.
  2. I maintain a certain pattern to the day, with my morning bath signalling me that I am starting my work with a fresh mind and spirit. After breakfast is when my day officially begins — I turn on the radio and look at my to-do list (see #3).
  3. I jot down notes every night before I go to bed about what I need to accomplish the next day. This way, I’m actively placing my worries onto paper so I can go to bed not fretting about what needs to be done.
  4. I have a box labeled for each different project I’m involved in. So I toss everything I have in one box, and I don’t worry about misplacing things or ideas. This one was inspired by The Creative Habit
  5. I also keep a different sketchbook for different topics and ideas. I have one for business, one for random sketches and another for my writing. And in these sketchbooks I sometimes allocate different sections so that my thoughts don’t get messed up too much (there isn’t a search function on them, like a computer does!)
  6. And I throw these sketchbooks all over the place, so when I have a thought I scribble it down quickly.
  7. I try and find the pattern between things, and connect the dots between random things just for fun when I’m stuck in a rut. Like when I see the color yellow around me, and then I start to focus on finding yellow things — stuff that I didn’t notice before will show themselves to me. I’m heightening my sense of awareness because I’m narrowing my focus to one thing.
  8. Doing things differently helps. I love calligraphy, but sometimes I seem to be stuck in a rut — it seems that I could only write in a certain way! So I stop, and see what others are doing, and try to analyze what I could do differently. A little more pressure on the downward stroke? Or how about adding more flourishes to that letter? It took me about a week of constant practice to free up my hand. If you’re stumped for ideas, have a look at Keri Smith’s 100 ideas to get you started.
  9. Practice, practice, practice. Creativity is like a muscle that you need to flex regularly. I dread staring onto a blank piece of paper, but everything begins with that first stroke. I’m a perfectionist, so I train myself to not use erasers at all when I’m drawing. And if I do make mistakes, I start on a new piece of paper — that way I let new ideas in and not just dwell on what I previously did.

Here are some books in my collection that I pick up whenever I need a boost:

  1. The Creative Habit by Twyla Tharp : I love this book. Twyla is a dancer and choreographer, but a lot of the things she has to say cuts across all disciplines.
  2. How to Be an Explorer of the World: Portable Life Museum by Keri Smith : Keri reminds everyone to put on their explorer goggles and look at the world with new eyes — I did a review of her book here.
  3. Living Out Loud by Keri Smith : Although the book is a little girlish for guys, I love the article she wrote about how to find what you love to do
  4. The Alchemist by Paulo Coelho : This is an amazing book that I pick up and read again and again. The message is simple — you won’t find what you’re looking for until you follow through on your dreams.
  5. How to be an Illustrator by Darrel Rees and Nicholas Blechman : I like how they talk to illustrators and get their feedback on running a creative business.
  6. Lines & Shapes by Lena and Mav : Amazing artists and beautiful, beautiful pictures. I have volume no. 5 and I treasure it.
  7. The first issue of the Good to Know project : I like keeping a copy on my bookshelf so I can read up on what my friends have to say about being creatively stuck.

Sis Boom Nuggets

Posted Saturday, August 01, 2009

5 years ago I stared a 'Women Entrepreneur' scrap book - merely as inspiration for myself...I mean - if they can do it - I can...right?! RIGHT! SO - It has grown and grown I now have 2 HUGE volumes and it's great to see women who I have in the scrapbook when they were just starting out that are now very successful and extremely popular, like Carol's Daughter hair and skin care, I was reading about her when she was just selling out of her home and thinking about expanding, now she's seriously rocking and rolling! Hopefully, an article about ME will one day be in my scrap book! hee hee!

I take the book out at least a couple of times a month and go through and read a few articles for inspiration. Last night I was skimming through...and on page 27 of my scrap book is Sis Boom - Jennifer Paganelli is the creative genius behind this line of fabrics and patterns. The name for her business was the actual nickname that her twin brother called her when they were growing up!

There are 3 specific statements from her article that I would like to share with you today.


1. DON'T WORRY
"I used to be so worried that my family would feel left out because I was so busy, or overwhelmed by so much stuff everywhere. (The business has definitely spilled into every room int he house!) But I've learned that the family is happy when Mommy is happy. Doing something you love is the best example you can set for your kids!"

2. DON'T WAIT
"Back in 1995, when I first started this business, I was living in a new state with a toddler running in and out between my legs. I didn't have a brilliant plan the, but I did have all these old textiles and wallpapers that I'd collected at flea markets over the years. I've learned the best business ideas are usually hiding somewhere in your hobby!"

3. WORK YOUR WAY
"Everyone has a work style, but it can take awhile to be honest with yourself about just what that is. I used to believe that I needed the perfect work space to get things done. What's more it had to be clean! But over the years I have learned to let my craft room be the place where I work and work - and then sweep when I have the time!

I hope you Diva's have a rock out Saturday! Hope these 'nuggets' give you inspiration - like they do me - wishing you every success! SMOOCHES!


Pricing Strategies

Posted Saturday, July 25, 2009


In the forums, both Etsy and EtsyKids there are always questions about wholesale pricing. As a rule shop owners expect to pay half of your retail. Now - if your retail price is very low then half of that sounds ludicrous... I hope that this post will encourage everyone to take a look at how much their work is really worth. And also let consumers understand the value of hand made goods!

The wholesale price is figured from adding the cost of materials, cost of labor and hourly cost of doing business.. (Many sellers use a wholesale price for the retail price - which makes it impossible for them to maneuver in the wholesale market).

For example lets say you weave rag rugs and want to know what your wholesale price should be. Materials for rags and thread are $5.25. Next add cost of labor - we'll say you pay yourself $15/hr and it takes you 2 hours per rug for a total of $30. Now you add your hourly cost of doing business (also known as overhead) - include etsy fees, PayPal fees, electricity, etc..(if you don't include all of your indirect costs in figuring your prices, any financial projection you make about your business will be unrealistic.) For this example will say our hourly overhead is $8.81. This gives us a wholesale cost of $44.06 per rug. To get your retail price, in most cases you double your wholesale price. Most shop and gallery owners mark up 50%-60% - so if you double yours then you will be close to the shop price. (the reason for this is a shop owner cant sell what she bought from you for $80 if your selling it in your shop for $40.)

This is just a spring board for pricing. You have to know your market and know if the market will bear your prices AND LET ME SAY THIS- Your market IS NOT Walmart . Hand made things should never be in competition with Walmart or large chain stores like that. When people are shopping for hand made items they expect to pay boutique prices, not discount store prices. If your prices are cheap they expect that the quality is as well. Your market should be consistent with what you see in high end boutiques. Educate yourself about your market, research, never stop learning!

The BIGGEST mistake new Etsy vendors make is setting prices too low. And I did the same thing in the beginning. I sold dresses for $10 for 3 years. And I wish 100 times over that I could get all those dresses back - I actually had one honest customer email me later that she had sold 2 of my $10 dresses for $75 each at a swap meet! That email changed my life - as you can imagine! LOL! I unlisted everything in my shop - re-priced and re-listed and felt much better about selling. Granted stuff didn't sell as fast as it was at $10 (of course) but when I sold something I didn't fell like I was giving my time away.

Just thoughts from my head to yours! I hope everyone enjoys this fab weekend! XO

Personal Independence

Posted Saturday, July 04, 2009


I WANT TO WISH EVERYONE A WONDERFULLY CELEBRATORY INDEPENDENCE DAY! GET OUT AND HAVE FUN! XO

In our professional and personal lives, we often lose track of our own needs--and rarely address them. Make this Independence Day different!
  1. Step 1
    Pick a day that belongs to you and you alone--no meeting family needs or job requirements and proclaim to all that this is "MY INDEPENDENCE DAY".
  2. Step 2
    Go to any place that brings you serenity and allows you to focus and identify how you got SO lost-and how you can find yourself, by identifying those activities and behaviors that makes you feel content, fulfilled and at peace.
  3. Step 3
    It may have been a long time since you have focused on yourself, so bring a pen and tablet, to list your own needs. Until your own needs are met, it's pretty hard to satisfy others, without harboring resentment.
  4. Step 4
    Announce to family and co-workers that you are making changes in the way you participate in life--AND follow thru.
  5. Step 5
    Your new found activities may include joining a gym, or a garden club, taking a class, learning to play an instrument or even learning about the artist in yourself, through a craft.
  6. Step 6
    Keep the new you in the front of your mind, because it is much easier to slip back into the old routine of being everything for everybody.

Different...

Posted Saturday, June 27, 2009

Good Morning Divas!!!
I hope everyone had a fantastic week, despite the tragedy's in the entertainment world. I know all three deaths impact almost the entire worlds population. It makes you see that even people we grew up thinking were untouchable....well, aren't - and we should cherish each moment we have with our loved ones and live life to the fullest.

Today I would like to share a small piece that my boyfriend (for you Sex and the City fans - he's my man friend - LOL) sent to me and I got it yesterday.


People share so much in common, yet are so magnificently different. They think differently; they have different and sometimes competing values, motivations and objectives. Conflicts naturally ark out of these differences. Society's competitive approach to resolving the conflict and differences tends to center on 'winning as much as you can' Though much good has come from the skillful art of 'compromise', where both sides give on their positions until an acceptable middle point is reached, neither side ends up truly pleased. What a waste to have differences drive people to the lowest common denominator between them!!! What a waste to fail to unleash the principle of creative cooperation in developing solutions to problems that are better than either party's original notion!!!

This, of course is true with your significant other, work affiliates and kids, it is true in almost any situation. It feels extremely uncomfortable at first (for a professional arguer like myself) but once you get in the habit of really listening to the other opinion instead of just 'thinking of what you'll say next - once they shut up'. I can personally vouch that this does, indeed work!

Enjoy your weekend! Me and my crew are off to the pool!

So the Pie isn't Perfect? Cut it into Wedges

Posted Saturday, May 23, 2009


Happy Saturday Diva's! I'm so happy this is a long weekend for me, I'm working on the largest order I've ever had and I hope to ship it out this weekend! So~today we're talking about Pie's -

Martha Stewart's #8 Rule in business and life.
Back in Martha's catering days she was hired to cater a dinner for Paul Newman and Joan Woodward; which was a major thing for her in those days. She decided to prepare a Moroccan buffet for the event, and the main feature was 8 b'steeya, four from chicken and the others with squab (small foul). So while they were baking Martha made the mistake of leaving the b'steeya unattended and stepping out of the kitchen and when she returned all of the pies were burned on the crust that was closest to the oven wall. She was horrified!!! There was no way she could make more in time and her reputation as a caterer was at stake. So, she took a deep breath and made an assessment. She saw that although the pies were no longer perfect, the vast majority of each was fine and undamaged. So she picked up a knife and cut each pie into wedges, discarded the burnt pieces, arranged them on a platter and sprinkled with spices. Martha served the pies as if nothing were amiss, and the party was a huge success.

The moral: When faced with a challenge, in business or life, evaluate/assess the situation, gather the good things in sight, abandon the bad, clear your mind and move on. Focus on the positive, stay in control and NEVER panic.
...now im hungry....im goin to veg! Smooches!
Related Posts Plugin for WordPress, Blogger...