
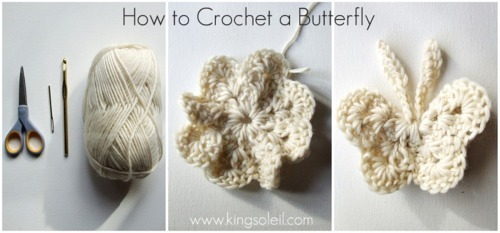
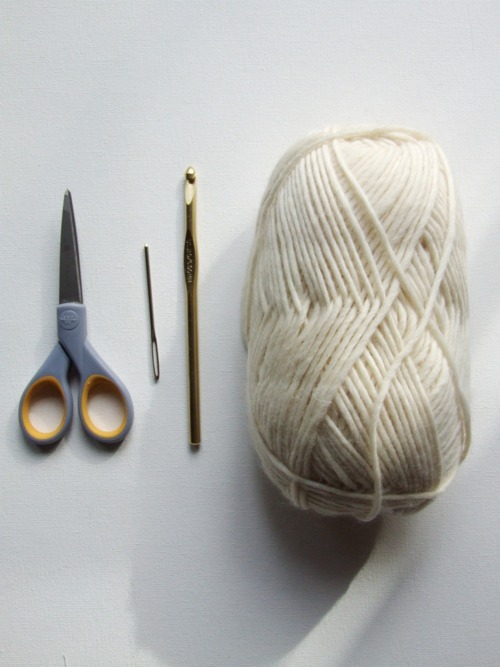
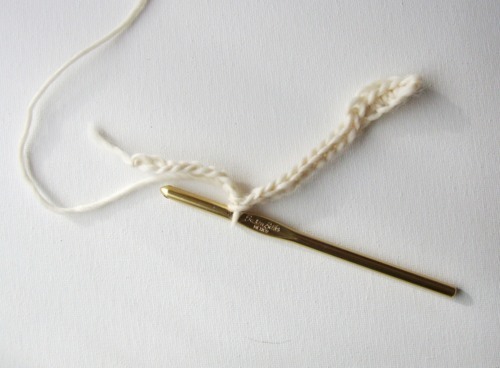
For this tutorial, I use Stitch Nation Peruvian Wool in the Ivory Color and a size J crochet hook. The only other tools you will need are a tapestry needle and scissors. This makes a chunky textural butterfly, and after I crocheted her (I dub this one a girl) I actually thought she looked a bit like a moth and was inspired by a silk moth to make her antennae a bit thicker at the top (more on that later).
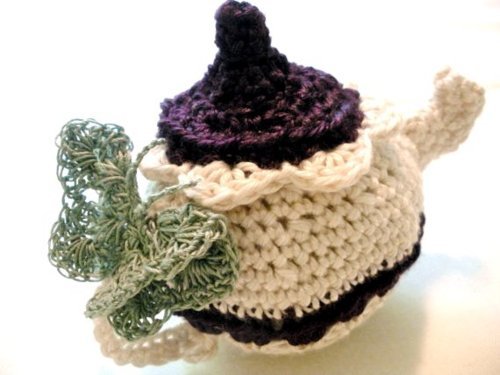
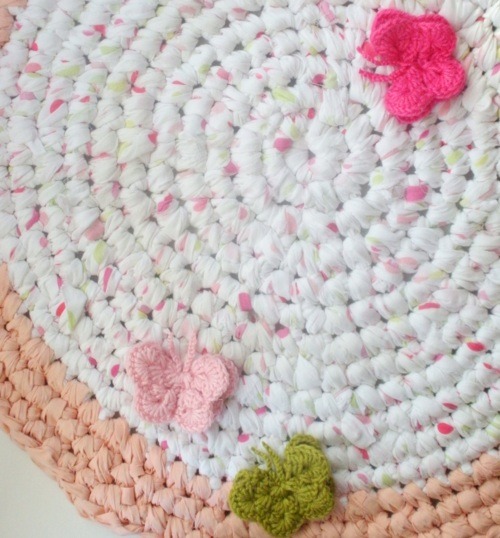
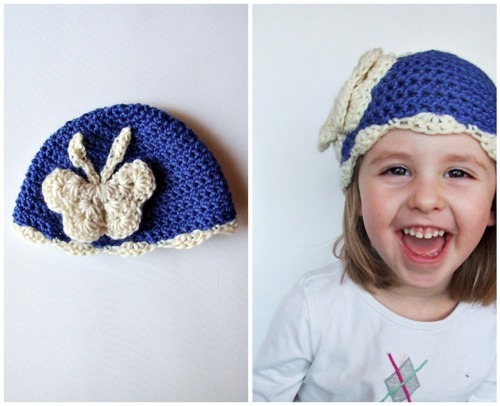
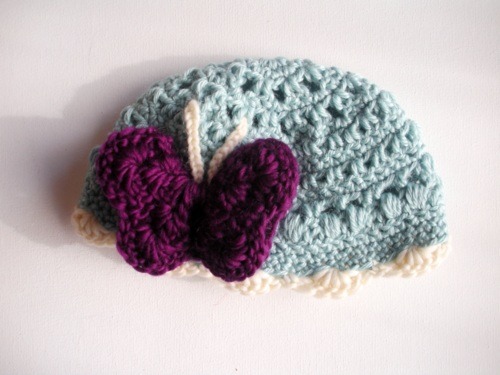
To make a more delicate butterfly, you can use crochet thread, as I did with this applique on the amigurumi tea pot handle. Or use a medium weight yarn as I did on this baby blanket and rug.

For this pattern, you will need to know how to slip stitch (sl st), Chain (ch), Single Crochet (sc) and Double Crochet (dc). Easy peasy, right?! Right.
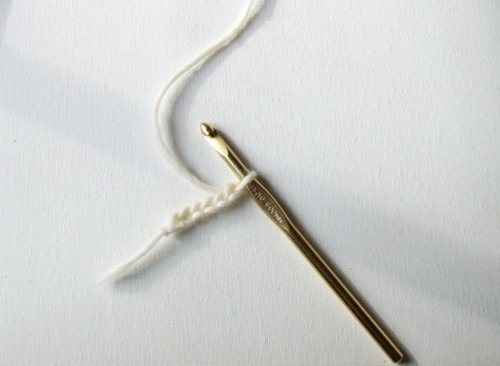
Sl st and then ch 6.
Insert your hook back through the first ch, yarn over hook and sl st to form a circle.
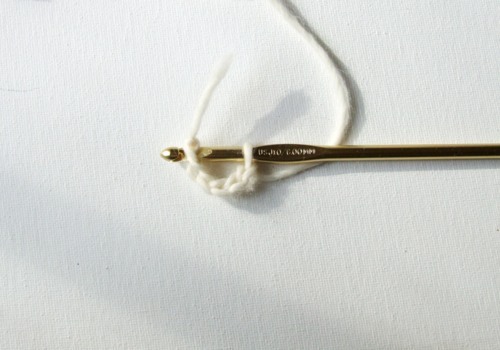
Round 1: Ch 3 (this will count as your first dc). 2Dc into the circle. [To dc into the circle, yarn over hook, insert your hook into the circle, yarn over hook, pull back through the circle and complete your dc.] Ch1. *3dc, Ch1* repeat this set 6 more times so you have a total of 8 sets of 3dc's grouped together.
Sl st in the third ch of the first ch 3 to close the round. At the end of Round 1, you will have 8 ch1 spaces that will eventually be the butterfly wings.

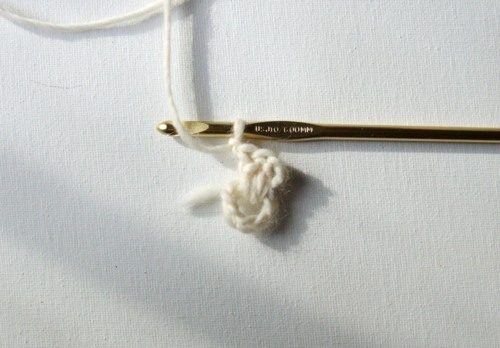
Round 2: Insert your hook into the ch1 space, yarn over hook, sl st, ch 2 (this will count as the first dc). 2dc into the same ch 1 space, ch 1, 3dc into the same ch1 space. *3dc, ch 1, 3dc* into each ch 1 space. Sl st into the second chain of the ch 2 to close the round.
At the end of Round 2 you will have 8 sets of 6dc’s separated by a ch 1 space.
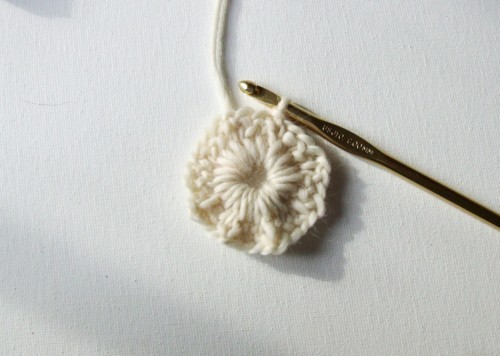
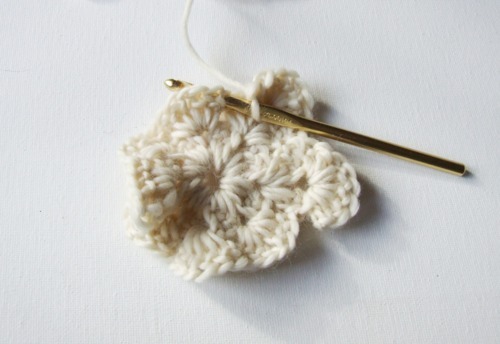
Your piece will be quite ruffled at this point, but don’t worry! You will be folding this in half and the ruffles magically disappear.
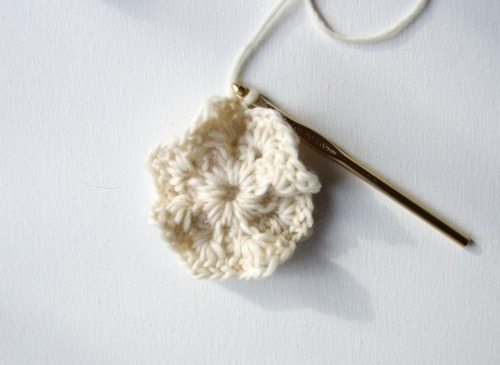
Round 3: Insert hook into the ch 1 space, yarn over hook, sl st, ch 2. (This will count as your first dc). 7dc into the same ch 1 space. Sc in the stitch in between the two ch 1 spaces. This will anchor your wing so it is nice and rounded. *8dc into each ch 1 space, sc in between* Sl st into the 2 ch of your first ch 2 to close the round.

When you are finished, you will have 8 sets of 8dc’s in each ch 1 space.
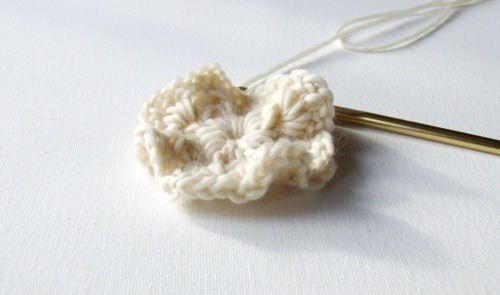
Sl st to knot and tie off your yarn with an extra long tail. You will use this to sew your butterfly together. Fold your round ruffled circle in half, aligning each set of four wings with the tail at the bottom.

Sew up the center until you reach the inner circle of Round 1.
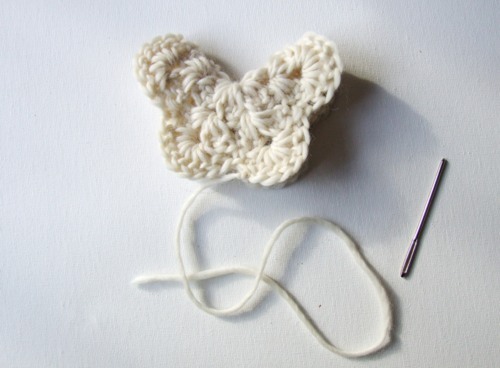
Ch 25. Sc in the second ch from the hook and in the next 4 stitches. sl st in the next 14 stitches and sc in the last 5 stitches. Tie off. This creates the thicker ‘silk moth’ antennae. If you would like the straight antennae you see on my other butterflies, simply chain your desired length, super tightly.
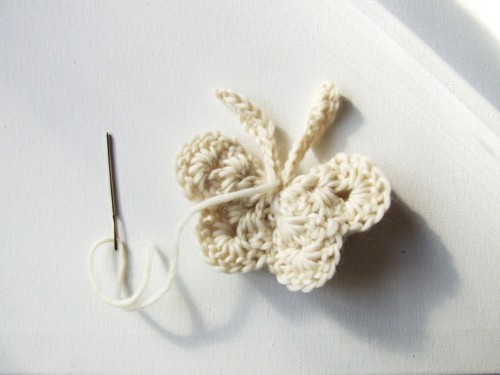
Fold the antennae in half and place on the top of the butterfly. Take your tapestry needle and sew to secure.

Weave your thread into the inner wing and Voila! A three dimensional, perfectly pretty crochet butterfly!
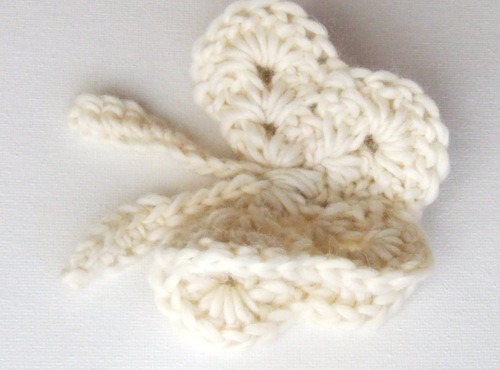
With wings that can move up and down…flutter flutter!
This tutorial AND all pictures are the property of King Soleil. Want to share how to crochet a butterfly? Please do! But make sure to link back to www.kingsoleil.com ! This tutorial and butterflies made are great for personal use, decoration, and gifts and are not intented for selling/profit. Thank you and enjoy!
4 comments:
Darling!! NEVER would have guessed you crochet a flower and fold it in half ... genius, and so cute!! Thanks for sharing.
I can't wait to try this! Thanks for explaining it in a way that doesn't seem like a foreign language.
Thanks a lot for sharing this cute butterfly, I made it and it came up beautifly. I love it.
Great pattern to follow, thank you
Post a Comment