
 One rainy day, my son and I needed something to do. We’d played, watched TV, done puzzles … we were bored. So, I started flipping through Usborne Summer Activities, and we decided we’d try our hand at making pop-up cards.
We had so much fun that we ended up making six of them to send to family and friends. This was a great activity for my son (he’s three) because there were lots of things he could do and decisions he could make. As he gets older, I can see him taking on this project from start to finish. For now, though, he needed help with the scissors and the assembly of the cards.
Christmas and the holidays are going to be here before you know it -- no, really, I saw Christmas decorations going up in Hobby Lobby the other day -- so if you're a cardmaker, now is the time to get started on your holiday cards. And if you've got kids, this is a great way to get them involved in the process. There's a good chance I'll be resurrecting this project and dragging out trees, stars, Santa, and reindeer stickers!
Here’s what we did:
First, cut two pieces of paper exactly the same size. I used white cardstock and cut ours 5” x 10”. Folded in half, it makes a 5” square card. (Next time, I think I’ll break into my patterned scrapbooking papers rather than just using white -- maybe those Christmas and winter papers!)
Take one of the cards, and make two cuts of the same length in the center of the folded side of the card.

Fold the flap made by the cuts one way and then the other. Crease.
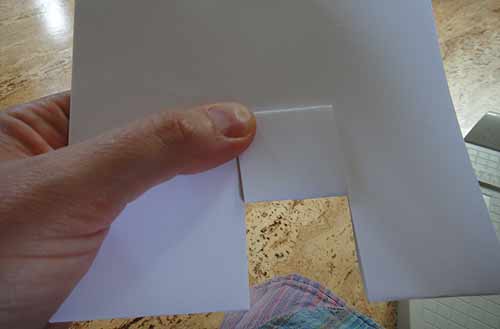
Open the card and push the center out so it pops up. Glue this card to the other piece of paper you cut. Don’t glue down the pop-up flap – you want this to stand up when the card opens!

I copied a page of several small vehicles for my son to color and dragged out all kinds of stickers. While he was stickering the cards, I cut out the vehicles he colored. Once he had covered the cards with stickers – sometimes two or three layers deep! – I glued the cutout onto the pop-up flap.


Write a note in them and address the envelopes, and they’re ready to go! Depending on the number of stickers your kid used, it’s wise to have them weighed at the post office in case they need extra postage. We used foam stickers, so ours cost a few extra cents per card.
Our recipients were delighted with them, and my son loved sending notes to some of his favorite people.

Have fun! -Cori of Peace, Baby! Batiks
*P. S. Please stop by and join the fun of today's EtsyKids BNR (buy and replace) Treasury! All of the EtsyKids featured in this BNR are having Xmas in July SALES and discounts!
1 comment:
Great tutorial. Looks easy. Thanks for sharing!!
Post a Comment